
 I feel like I have a pretty good handle on how to use my camera, but I know there are many features I have yet to play around with. So this weekend Drew and I went outside to try out the multiple exposure setting on my Nikon D90, and I am loving the results! I have taken multiple exposures on film but never with digital, and even though I love the darkroom process, you can't beat the instant gratification of a DSLR.
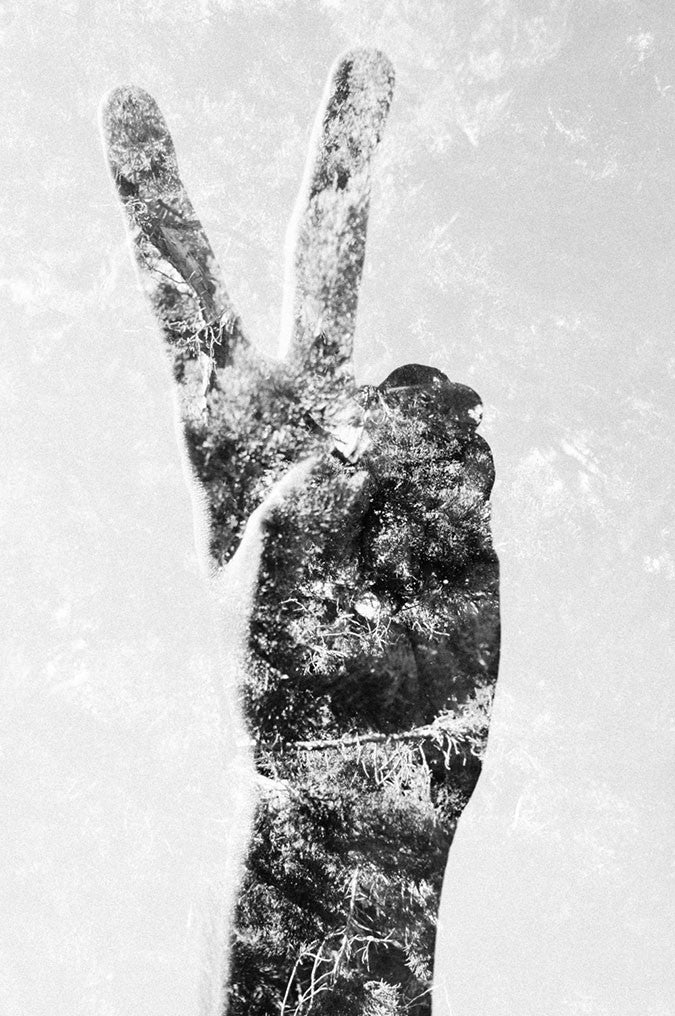
 To get to the multiple exposure setting on a Nikon (for other brands check your manual) press the menu button and then scroll down to your shooting menu. Next, scroll down to the multiple exposure option and press ok. The first option is the number of shots. To get this silhouette effect you will want to make 2 exposures so select 2. The second option is auto gain which when turned on will automatically cut the exposure of each photo by 1/2 to get the double exposure. When turned off you will have to manually adjust the exposure of each photo. I chose to leave it on.
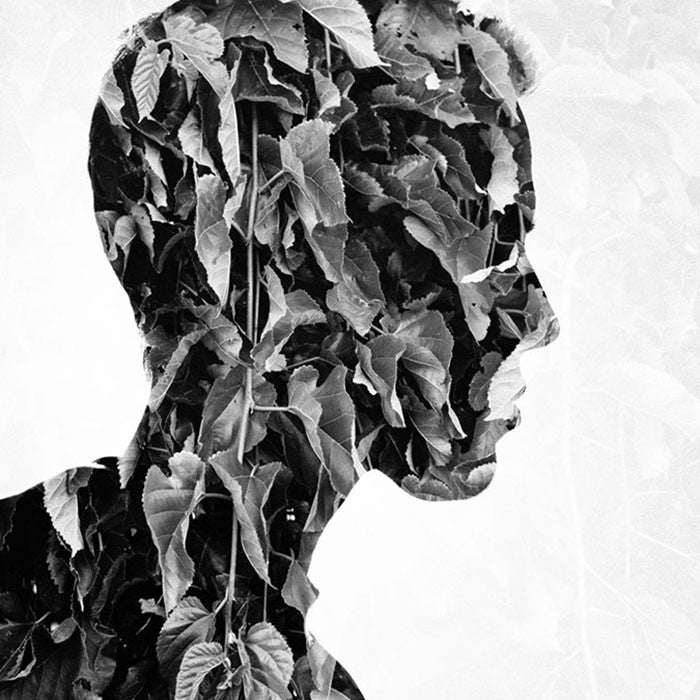
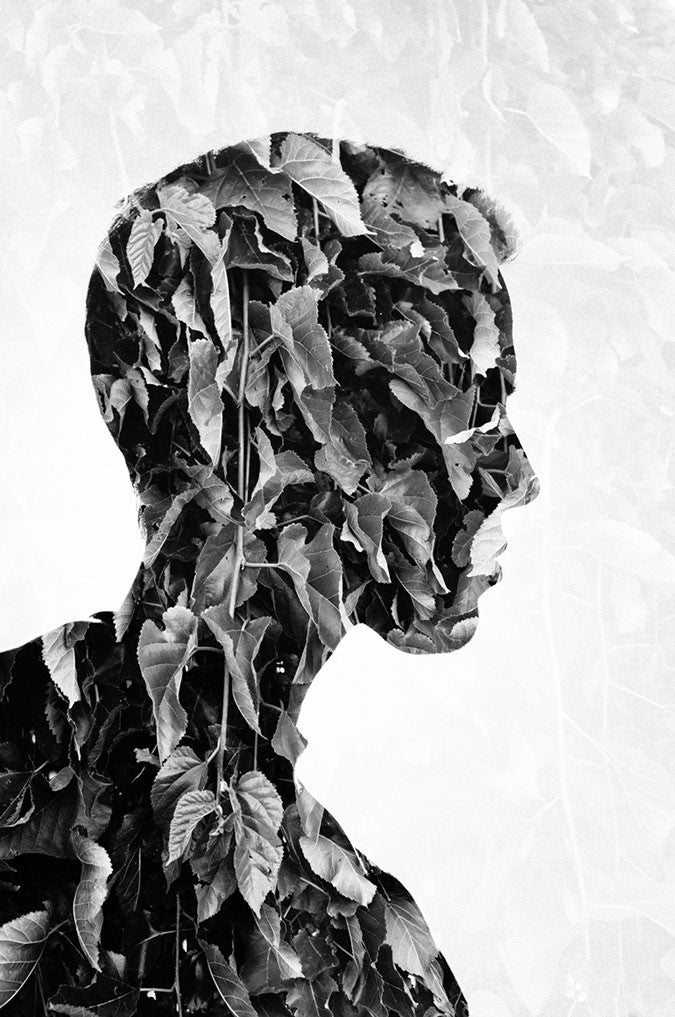
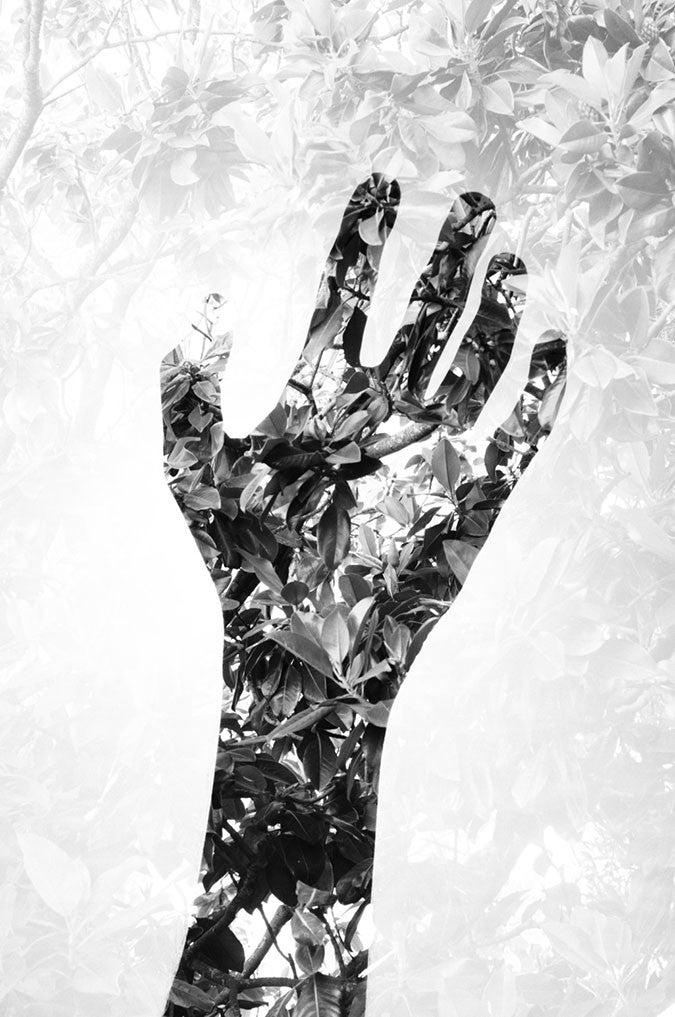
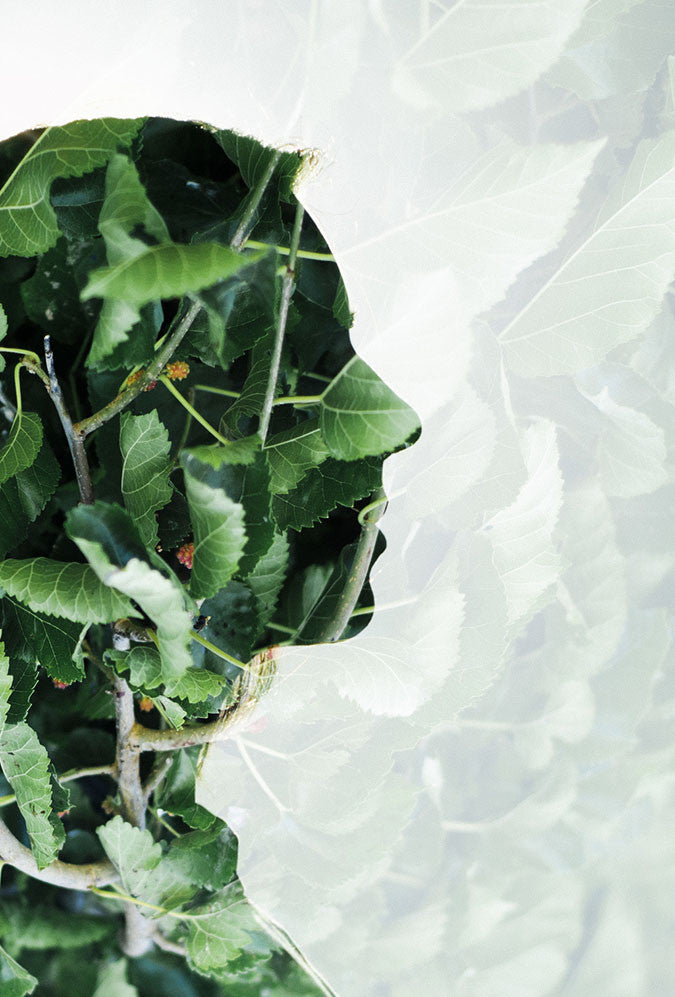 The first photo you take should be of the subject with the sun directly behind them and nothing in the photo but their head (or hand, or whatever your subject is). The next photo can really be of anything you want, I think it looks cool when it is a busier subject such as leaves or a pattern. I'm thinking I want to try it with clouds next. The thing to remember is the dark part of the first image is where most of the second image is going to show through.
 The one thing that I kept forgetting is that you have to go back into the menu and turn multiple exposure on every time you take a new shot. I can't wait to see what other effects I can get by making double (or triple) exposures. Have any of you ever played around with taking multiple exposures? I'd love to see!